Introduction
You’re likely here because you appreciate the unique blend of elegance and effectiveness that the one-handed backhand brings to the tennis court. There is something undoubtedly captivating about watching a tennis player execute this stroke with precision and power. Specifically, it’s the finesse and rhythm of a one-handed backhand that sets it apart from its two-handed counterpart. Despite its beauty, it remains a stroke that is not only difficult to master but also exceptional in its overall effectivity in the game.
Let’s take a brief detour down memory lane—many of tennis’s all-time greats, from Stefan Edberg and Boris Becker to the indomitable Ivan Lendl, were maestros of the one-handed backhand. Their performances showcased the adaptability and sheer versatility of this stroke. Notably, the allure of the two-handed backhand, with its speed and control advantages, was strengthened by players like Jimmy Connors, Bjorn Borg, and Mats Wilander. However, the pristine combination of power and elegance that the one-handed version provides has always given it a unique charm.
In the present arena, the tradition continues with the likes of Richard Gasquet, Dominic Thiem, and Stan Wawrinka, among others, all of whom have fine-tuned this stroke into a powerful component of their tennis arsenal. Not to forget the masterful executions by the genius himself, Roger Federer, whose one-handed backhands are a work of art that taught us precisely how captivating this stroke can be when administered with due diligence and, of course, with the correct technique.
As we delve deeper into developing your one-handed backhand, keep in mind the stellar strides and progress of these tennis icons as your guide and inspiration. Remember, every great achievement starts with a decision to try. Embark on this journey to master your one-handed backhand, and you could be the next player to make this elegant stroke the star of your game.
Understanding the Basics
Finding the Perfect Grip
Take a moment to envision this: Your hand grips the racket tightly, your fingers expertly aligning themselves along the handle. This grip – the ‘Eastern backhand grip’ – is akin to an experienced chef gripping a knife or a painter holding his brush, it’s more than just a connection, it’s an extension of yourself.

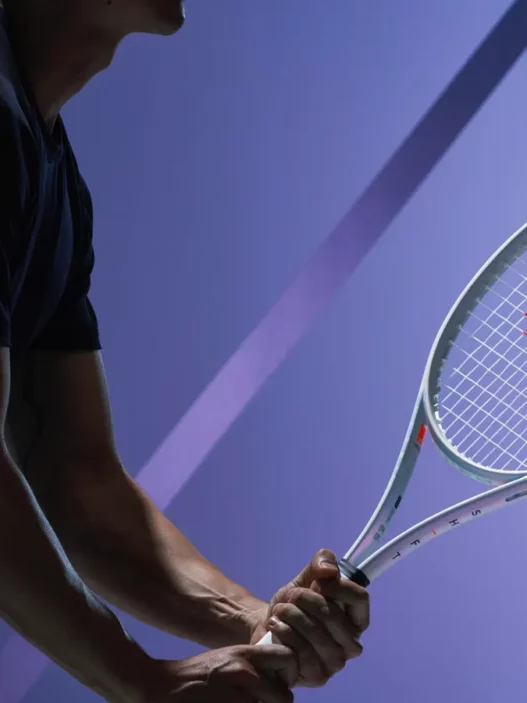
The Eastern backhand grip is ideal for the one-handed backhand, providing you with the right combination of control and flexibility. To achieve this grip, imagine you are shaking hands with the racquet. The base knuckle of your index finger should be on the third bevel (one bevel to the left from the top for right-handers). The fingers should wrap around the handle comfortably, while the thumb presses against the back of the handle for support.
With this grip, you can create the topspin necessary to keep the ball in court even when striking with full power. Seems like an intricate dance, doesn’t it? That’s because it is!
Embracing the Stance
Now that you’ve got the grip sorted out, let’s speak about something that is of equal significance – your stance. Picture this, it’s almost like a boxer preparing for a bout. They have a particular stance, which is pivotal to their movement, balance and ultimately their performance. Similarly, in tennis, your stance paves the way for a masterful one-handed backhand.

You could go for a closed stance, semi-open stance, or an open stance, all depending on the ball’s incoming trajectory and speed. A closed stance – with the feet perpendicular to the net – is the foundation and recommended for beginners. It provides stability, simplifies the swing and offers better control for the stroke.
As you improve your skill level, incorporating semi-open or open stances for varying situations increases your adaptability and enhances your execution of the one-handed backhand. Whatever your choice of stance may be, ensure that it’s the one lending you optimum control, balance and, essentially, a powerful stroke.
The art of mastering the one-handed backhand is a journey, accessible to all those willing to take the first step!
The Preparation Phase
Embarking on the journey of mastering a one-handed backhand starts with refining your preparation phase. The phrase ‘timing is everything’ truly shines here as your positioning determines the success of your stroke. Harmonizing your body with the incoming ball is the key.

The importance of timing the split step correctly cannot be overstated. This move allows you to react quickly and accurately to your opponent’s shot.
This brings us to the grip shift phase. It’s common for players to shift late towards the end of the backswing due to their focus on moving to the ball. However, an efficient grip transition must occur shortly after the split step and prior to the unit turn. By prioritizing this essential change from a ready position to a backhand grip early, you will normalize this action into your rhythm, enhancing your overall performance.
Moving on, let’s discuss the unit turn phase. Contrary to its two-handed counterpart, a one-handed backhand can be challenging due to its independent body and racket coordination. Remember, your upper body must turn as a single unit, with your racket, arm, and non-dominant shoulder acting as a single ensemble, preparing for the fierce act of hitting the ball. Arriving at this coordination can take practice, but it’s essential to perfect your one-handed backhand.
Connection, coordination, and timing are your allies on this journey. As you navigate through these phases, ensure to spend quality time sharpening these techniques until they become an organic part of your game. Let’s remember, Rome wasn’t built in a day. So be patient with yourself and your progress.
Execution of the Stroke
The execution of a one-handed backhand is an art splattered with numerous nuances, but we’re going to simplify it for you. It’s a sequence starting with the grip, progressing through the unit turn and backswing, reaching the point of contact, and finally, the follow-through. Firstly, master the grip. A common method preferred is the Eastern backhand grip. This is where the base knuckle of the index finger and the palm’s heel pad are placed on the third bevel of the tennis racket handle. This grip allows for power and control, essential for executing a one-handed backhand.

The Unit Turn This involves turning your shoulders sideways while the racquet goes back before the ball has bounced on your side of the court. The non-dominant arm should point towards the incoming ball. The unit turn acts as a spring, enabling you to release power during the uncoiling phase.
The Backswing Subsequent to the unit turn is the backswing. You should focus on three phases—horizontal, diagonal, and upright. Your racket should start in a horizontal position close to your body, then move diagonally upwards, and finally end in an upright position above your shoulder.
Uncoiling and Contact The uncoiling phase commences when you start rotating your body back to its original position while bringing the racket forward. As for the contact point, always aim to hit the ball at waist height. At this stage, the back of your body, the back of your hand, and the back of your racket should all line up at the point of contact.
The Follow-Through
Think of the follow-through as a significant element of your one-handed backhand drive. An effective follow-through can immensely enhance your accuracy and consistency on-court, especially when attempting attacking shots. Yet, it’s not as complex as you might think. It’s predominantly a continuation of your unit turn and uncoiling.
Oftentimes, you’ll observe players, particularly those trying to introduce extra topspin, concluding their strokes with their racquets finishing above or behind their heads, thereby adding a loop in their follow-through. This maneuver adds a degree of control to accelerated shots and also provides an increased opportunity to generate topspin.
Maybe you’re wondering, how exactly can I control my follow-through? Well, it’s about slowing down and managing the execution. Don’t let the prospect of an ‘attack’ shot cause you to rush your swing or compromise your form. Keep to your game plan and adhere to your desired technique – even if it initially makes you miss a few shots. Perfecting this will not only help you generate pace but also maintain shot accuracy, equating to a powerful tennis stroke.
Your follow-through may also be extended, but avoid bringing it too much around your body. The key to mastering this all-important phase of the one-handed backhand technique lies in practice and awareness. Equip yourself with these insights, and you’re well on your way to perfecting your shots.
Footwork and Movement
The footwork for a one-handed backhand can either adopt a closed or open stance, though the closed stance is commonly recommended for beginners. Having a solid foundation in your feet is a prerequisite to creating a seamless balance, which in turn dictates the success of your backhand swing.
An essential element of the footwork is foot orientation when stepping forward into a neutral stance. The direction your toes are pointing affects the swing motion of your upper body, thus impacting the control and power of your backhand. The ideal foot orientation here would be slightly sideways, allowing for a natural transition of body weight from the back foot to the front foot as you swing.
As you extend your swing, the focus should be on the correct follow-through for attacking shots. Your swing shouldn’t stop the moment you make contact with the ball. Instead, it should naturally extend forward, as though you’re trying to hit through the ball. This extension is especially vital in attacking shots, helping you generate the necessary power and spin.
It’s important not to step out of the backhand early with the front foot. This mistake can prevent you from maintaining balance and control over your backhand swing. Instead, stay grounded, letting your back foot pivot naturally as your body rotates, adding to the power and precision of your swing.
Keep in mind the checkpoints of the unit turn: hand position, shoulder turn, and body alignment. Your backhand swing begins with a unit turn, which is essentially a rotation of your upper body. Remember to maintain the correct hand position on the grip, turn your shoulders comfortably, and keep your body aligned with the direction of your shot. These key checkpoints of the unit turn can greatly enhance the overall quality of your backhand.
Controlling the one-handed backhand in different situations requires adjustments to the fundamental technique. To control accelerated shots, for instance, slow down and control the follow-through. This will provide you with the necessary time to prepare for the next shot, ensuring consistently powerful and accurate backhands.
In essence, the one-handed backhand technique should be broken down into smaller and simpler chunks, allowing you to focus on each phase individually with key checkpoints. This will enable you to understand, improve, and then fundamentally integrate the technique into your tennis skill set, becoming more proficient on the court as a result.
Common Mistakes and How to Avoid Them
Let’s delve into some common errors we often see players making when trying to perfect a one-handed backhand and how we can work to rectify them. One of the easiest hiccups to correct involves the direction of your shoulder line. Aligning your shoulders with the net during your stroke will help you maintain control over the direction of your shots.
Sometimes, players over-complicate their strokes, especially when dealing with fast incoming balls. The key here is simplicity. Avoid rushing. Simplify your stroke and focus on timing. This might mean you initially make ‘good misses’, where your shots may not land perfectly, but your form is correct. This is more beneficial in the long run – stick with it!
Another common mistake is rushing the follow-through. It’s crucial to slow down this process to increase consistency. Fast or disjointed follow-through can result in poor shot quality. Treat your follow-through as a critical part of your stroke, not just an end result. Remember, the pace of the follow-through should be controlled and deliberate, not hurried.
Beware of biting off more than you can chew. If the technique seems too challenging to execute in one go, simply break down the one-handed backhand into smaller, simpler chunks. Work on each phase separately until you gain confidence and comfort in executing them.
This process can be time-consuming, and you may not see progress overnight. Don’t expect to master this technique immediately; it takes patience and practice. Invest quality time in practicing these methods and gradually, you’ll see your one-handed backhand improving.
Drills for Improvement
Building the Backhand with Practice Drills
Success in your one-handed backhand doesn’t happen overnight. It demands diligent practice and consistent efforts to master. Let’s explore three incredibly effective methods to help cultivate your backhand stroke, turning it into a reliable and powerful weapon in your tennis game.
First up, we have Shadow Swinging. You may be curious, wondering how swinging without a ball could help. Think of it as the backbone of your backhand practice. It allows you to build essential muscle memory for the correct backhand stroke. Visualize the ball and focus on executing the perfect technique over and over again. By practicing this motion consistently, your body becomes attuned to the correct feel and timing of the stroke, setting a solid foundation for your backhand.
Moving on, Wall Practice acts as your resilient opponent, sending the ball back to you as fast as you strike. This drill helps you focus on honing your consistency and putting the right amount spin on your shots. The key here is to maintain a steady rhythm, ensuring your one-handed backhand meets the ball at the correct contact point every time it rebounds from the wall. Remember, consistency always overrides power in the early stages of mastering your backhand.
Lastly, let’s get into Feeding Drills. Collaborating with a partner or coach for feed ball drills gives you a chance to cement your backhand under different court scenarios. The varied feeds force you to adapt and use your one-handed backhand effectively in defensive, neutral, and offensive positions. This variability gives your practice depth, mimicking real match scenarios, and preparing you to respond efficiently during games.
While the one-handed backhand seems daunting to begin with, breaking down the process into smaller, manageable chunks lets you develop the stroke effectively. And remember, in all drills, consistency triumphs over power – focus on getting your technique right, and the powerful blows will follow naturally.
Advanced Techniques
Slice Backhand
Let’s delve into the slice backhand technique. A darling tool of classic players like Ken Rosewall, the slice backhand can be an effective shot to have in your arsenal.
Now you may ask, what’s so special about the slice backhand? Well, it’s the unexpected spin. With a typical backhand, the ball tends to travel in a straightforward path. A slice, on the other hand, puts a backspin on the ball. This backward rotation slows the ball’s forward motion, making your shot tricky for opponents to return.
The process of executing a slice backhand begins with the continental grip. Aim for a cut that’s about 45 degrees to the bottom of the ball. I won’t sugarcoat it; it’s challenging, especially if you’re aiming to consistently pull off deep, low yet quick slices. But the practice will pay off. Not only can slice backhands disrupt your opponent’s rhythm, they’re also impressively versatile, helping you execute an array of shots such as lobs, drop-shots, and bluff shots.
Approach Shots
Another strategy to elevate your game? Master the art of using the one-handed backhand as an approach shot. Approach shots are typically performed from the baseline or to prepare for a net play. To do this effectively, an understanding of geometry and timing is necessary.
When performing an approach shot, aim to hit the ball deep into the opponent’s court, forcing them to make a move. Approach shots don’t have to be hard or fast; instead, they should be accurate and strategic, leaving your opponent off-balance.
Address the ball earlier than usual, hitting it cross-court to give you ample time to close down the net. Remember: the purpose of an approach shot is not just to win the point outright but to set up an advantageous position where you could knock off an easy volley. Sounds like a plan, right?
Both of these techniques, the slice backhand and the approach shot, add more dimensions to your overall game. They require adjustments and adaptation of the basic one-handed backhand technique. But once mastered, they serve as testament to your evolved game – a testament of a player who isn’t just playing but strategizing too.
Honing Your Technique
All of these techniques can only be effective if carried out with proper mechanics. Ensuring that you’re consistently applying the correct technique is crucial. A great way to do this is by breaking down the one-handed backhand technique into smaller chunks. Focus on each phase and understand the key checkpoints to bring consistency and accuracy into every shot.
Conclusio
A one-handed backhand, without a doubt, may seem challenging at first. However, remember that it is an essential part of a strong, all-round tennis game! You’ve seen the basic principles, the correct grip and stance, how to prepare and execute the stroke, control your footwork, avoid common mistakes, and practice drills to strengthen your skill. We’ve also touched on more advanced techniques and explained how one-handed backhand can be adjusted to various situations.
Don’t forget that like any good thing, mastering the one-handed backhand takes time and continuous practice. It’s not unusual if you’re finding it difficult at first – tennis is a game of advanced motor skills and the one-handed backhand is typically harder to develop than its two-handed counterpart. This is exactly why it’s crucial to break down the process into manageable chunks, just as we did in this guide.
Make use of the video courses available and revisit this guide whenever you need a refresher. Experiment with the techniques you’ve learned in different playing conditions to truly get a feel for the stroke. Remember that the key is not just to blindly follow a fixed set of rules, but to personally understand how slight adjustments in your technique can drastically change the result.
Always remember, step by step, stroke by stroke, with every training session you get a little better and the seemingly impossible becomes possible. Your one-handed backhand will soon become something you’re proud of. Keep practicing and never stop improving!


